- We are Fusion 360.
- We build AI-powered demand systems that generate, capture, and convert demand into predictable outcomes—engineered and operated by the agency built for the Intelligence Age.
- Fusion 360 — The Agency for the Intelligence Age.™

- Welcome to the Intelligence Revolution —
- The greatest shift in customer behavior is underway. People are revolting against stagnant companies and abandoning previous behavior and media habits. Discovery is now AI-driven. Attention is fragmented. Trust is earned across dozens of touch-points. The old agency model—siloed services and disconnected reporting is broken.
Nutraceutical Industry
$100 ↑ $48
CAC Decreased
Customer Acquisition Cost (CAC) dropped from $100+ to under $50.
Personal Injury Law
$1 Million+ /month
Revenue Increase
Monthly client revenue went from $1,230,984 to $2,299,934 (86.84% increase).
- Built for the Intelligence Age —
Akomplice Platform01
Structure before spend. Systems that learn.
Akomplice is the Growth System Platform behind every Fusion 360 Growth System. It turns market inputs, budget, goals, and conversion assumptions into a visible, deployable system before launch. Fusion 360's Senior Human System Engineers govern the model, while Platform AI Agents and Competitor Intelligence help the system adapt faster and make smarter decisions.
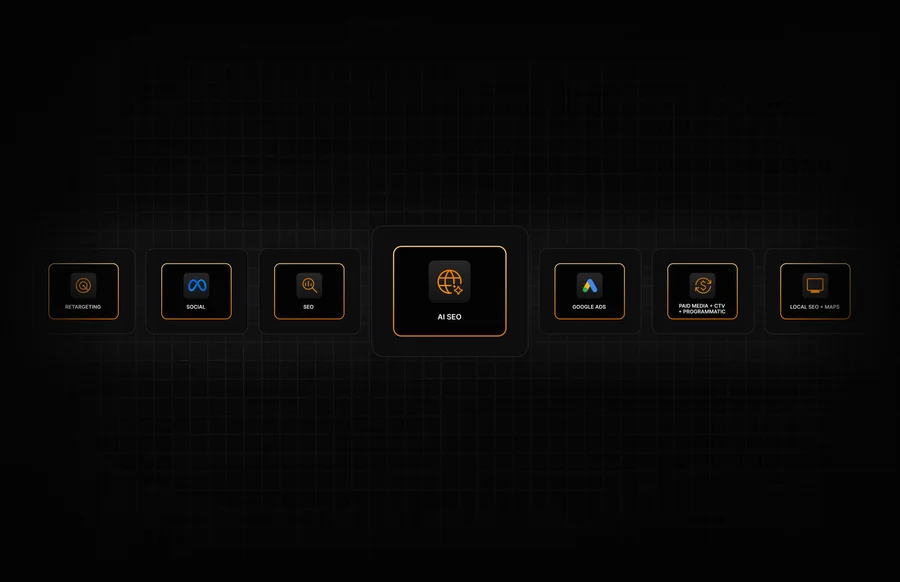
System Nodes02
Deployable demand across the buyer journey.
System Nodes consist of deployable channels like: SEO, AI SEO, Google Ads, Meta Ads, Paid Media + CTV + Programmatic, Retargeting, Local SEO, etc. These system nodes are the deployable demand packages inside the Growth System. Fusion 360 engineers each node to do a defined job across Awareness, Consideration, and Conversion so channels work together as one system—not as disconnected services.
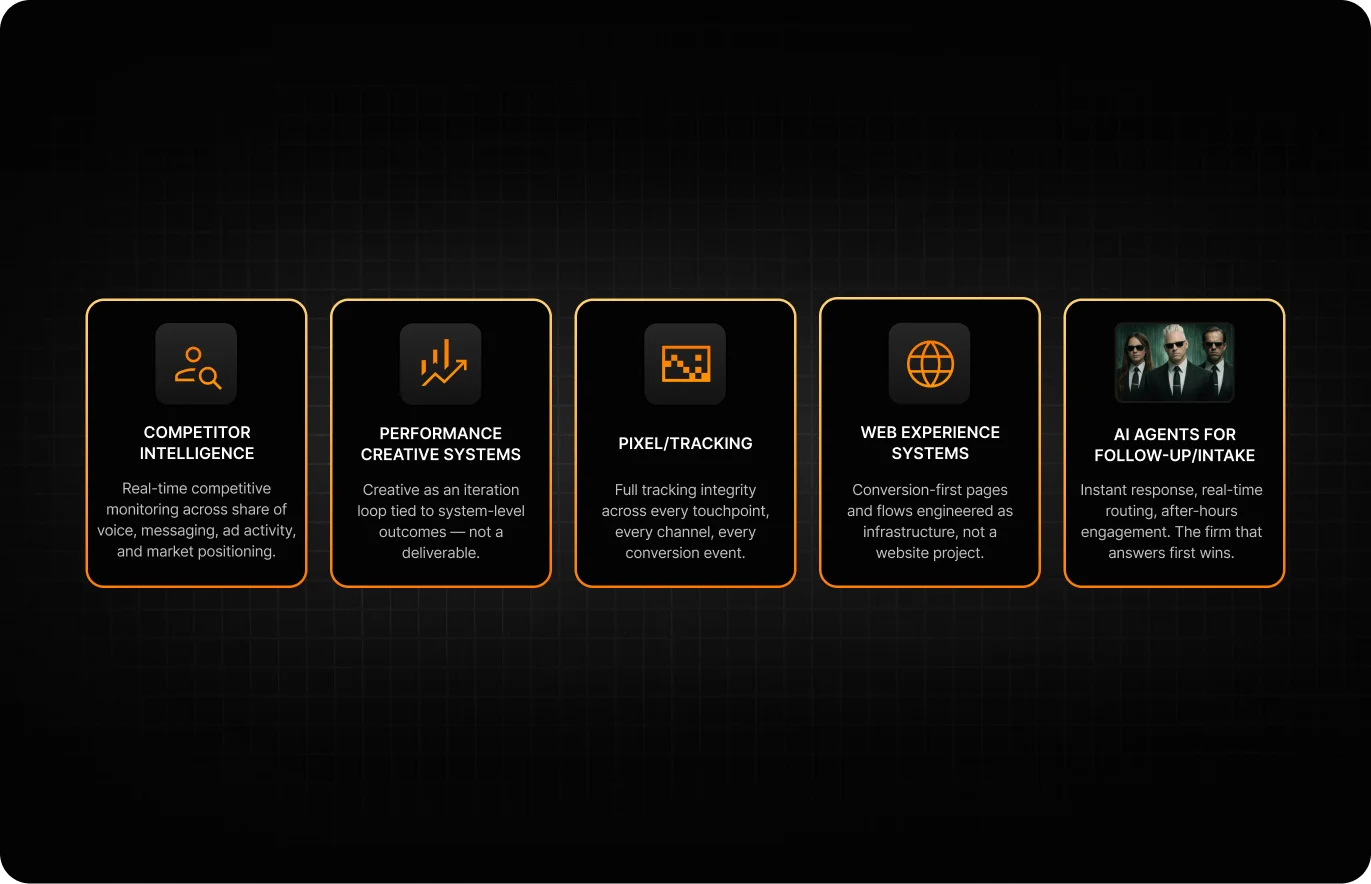
Conversion Infrastructure03
The layer that turns attention into action.
Conversion Infrastructure turns attention into action. Fusion 360 engineers Web Experience Systems, Pixel Tracking Integrity, Agentic Intake & Follow-up, Performance Creative Systems, and Conversion-Focused AI Agents so more demand becomes measurable revenue.
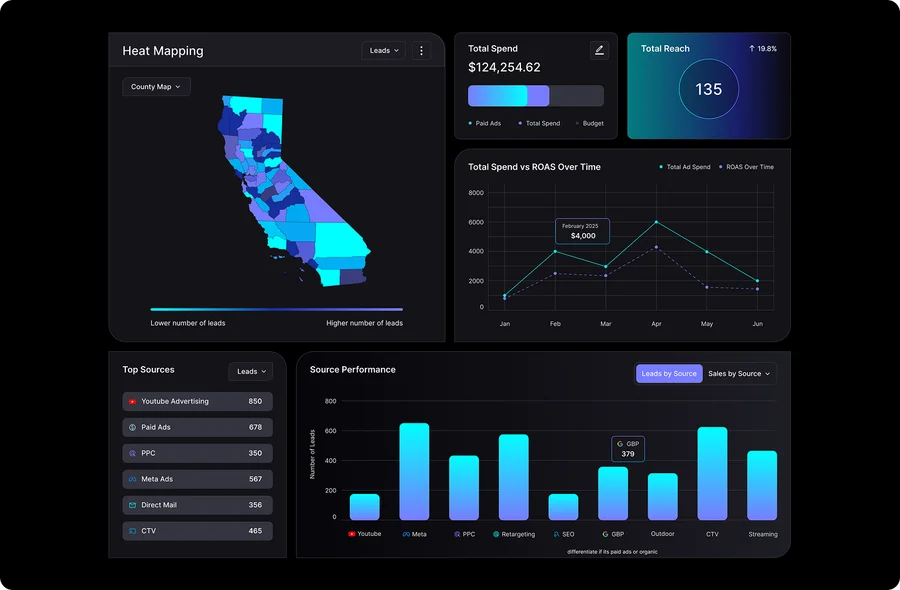
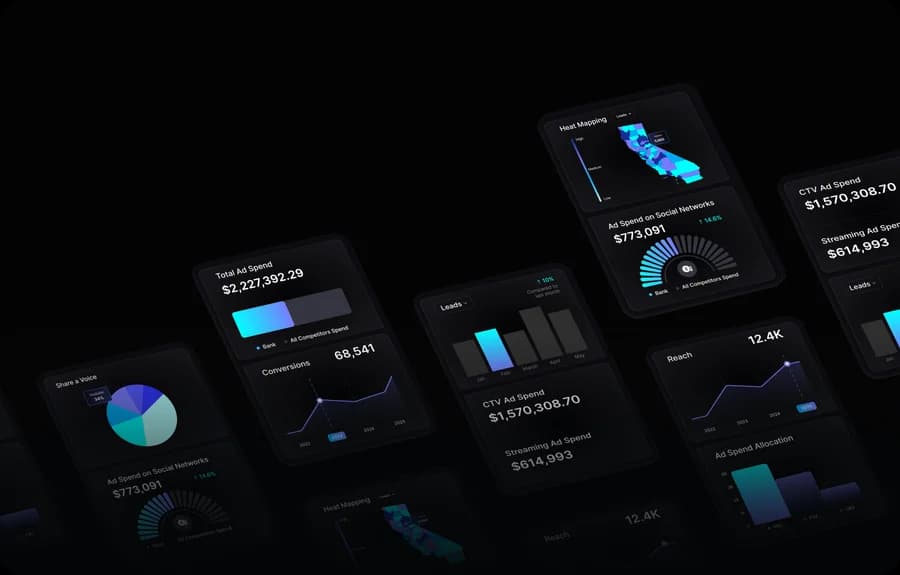
System Reporting04
One system view of performance.
Systems Reporting unifies visibility across System Nodes, Conversion Infrastructure, Performance Creative Systems, and outcomes. It brings together Multi-Touch Attribution, User Journey Analytics, and System Insights so leaders can see what is working, where demand leaks, and what to do next.
Trusted by —


Engineered for Any Vertical. Proven.
The Growth System operating model produces step-change outcomes across industries that look nothing like each other.
Nutraceuticals / Supplements
Over
50%
CAC Decrease
Customer acquisition cost (CAC) decreased from $100+ to under $50.
"Our CAC dropped from over $100 to under $50. Our ROAS climbed from 1.5x to nearly 5x. We didn't hire Fusion 360 for services. We hired them to build us a System — and the numbers tell the story. Fusion 360 doesn't just understand the supplement space. They engineered a system that proves it."

Bruce McMullin
President, SIBU
Personal Injury Law
x
35x
The Industry Average
Annual revenue growth of 86.84% = 35x the industry average of 2.5%.
"Most PI firms grow at 2.5% annually. Fusion 360 helped Robert DeBry average 87% growth. The difference isn't a better marketing program –– it's better marketing."

Ruth Bryan
Marketing Director

Plastic Surgery
x
400%
Return on Ad Spend
400% return on Ad Spend (ROAS) since implementing the growth system.
"Fusion 360 has been fantastic to work with. The results they have delivered for my practice have been dramatic. We're up over 1,000% with a 400% return on ad spend."

Dr. John Bitner
Facial Plastic Surgeon

The Agency Model Was Broken. So We Replaced It.
Fusion 360 is The Growth System Agency™. Akomplice® is The Growth System Platform™. Two brands. One operating model.
Your Data Leaves the Building. Ours Doesn't.
The industry is addicted to the status quo. Traditional agencies reset every month. Separate channels. Separate reports. Separate “wins.” No shared learning. The data their work produces leaves the building — to Google, to Meta, to HubSpot, to whichever platforms they happen to use. None of it comes back. Fusion 360 has spent 23 years engineering a system where the data stays — and compounds.
Cross-Channel Compounding™.
Every Growth System we operate generates outcome data — real performance signals across every channel, every touchpoint, every conversion event. That data feeds Akomplice Outcome Intelligence™, making your system sharper with every dollar spent.
Performance That Doesn't Reset.
Traditional agencies reset every month. New report. New strategy. New cycle. A Growth System doesn't reset — it compounds. The Operating Layer learns from every outcome, every channel interaction, every conversion signal. Month three is smarter than month one. Month twelve is smarter than month six. That's not optimization. That's compounding.
The Agency Powers the Platform. The Platform Powers the Agency.
Self-serve platforms don't have an agency producing outcome data. Traditional agencies don't have a platform turning outcomes into intelligence. Fusion 360 + Akomplice is the only model where both exist — and where the learning between them never stops.